本人在公司的PHP项目中,一直都在使用Symfony框架做开发。之所以会选择Symfony这个框架,是因为它作为一个企业级框架,有很多的优点:功能强大而全面,以至于众多PHP项目都在使用Symfony提供的组件;长期而稳定的技术支持,整个项目从2005年到今天已经走过了十几个年头,最终演化到了当前的5.1版本;此外还有丰富全面的文档、开源社区与商业公司的共同支持等等。而它最大缺点恐怕就是因为过于强大而全面的功能设计,导致学习的曲线有些陡峭,新手上手困难。
正好前几天Symfony更新了5.1的release版本[1],修复了大量的bug,感觉已经这个新版本的状态已经比较稳定了。所以今天我就带大家一块来试用一下这个新的版本。
安装之前需要确认部署的环境是否符合Symfony的要求,比如Symfony5就要求PHP的版本要大于7.2.5,并且开启了Ctype, iconv, JSON, PCRE, Session, SimpleXML, Tokenizer这些扩展。
Symfony的安装方式主要有两种,一种是使用官方提供的CLI工具[2],另一种是大家熟悉的Composer。现在几乎所有的现代PHP项目都在使用Composer,来进行第三方的依赖管理,所以这次我们就使用Composer来创建一个新的Symfony项目。
安装Composer
Composer是PHP用来管理依赖(dependency)关系的工具。换句话说,就是我们可以利用这个工具,直接在我们的项目中引入并使用别人写好的功能模块。
首先我们要下载composer.phar文件(windows可以去官网下载安装包):
# curl -sS https://getcomposer.org/installer | php为了全局调用Composer 我们把下载好的文件移动一下位置:
# mv composer.phar /usr/local/bin/composer最后查看一下Composer的版本,判断是否安装成功:
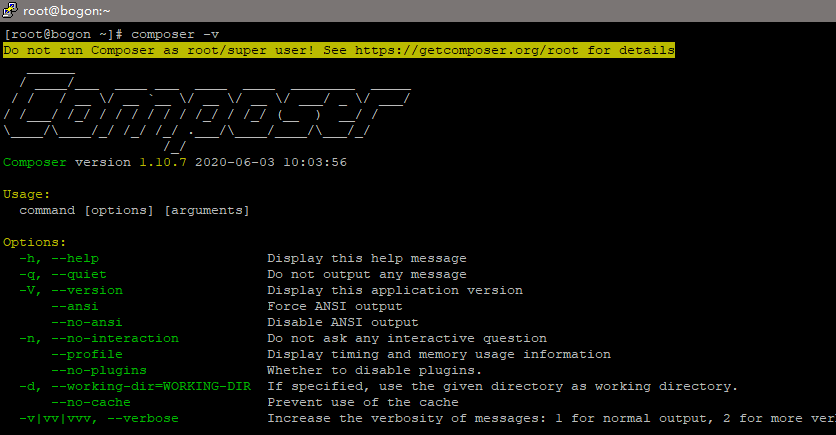
# composer -v
默认安装依赖会使用国外的链接,所以很多时候安装过程会很慢,以至于安装失败。我们可以配置成使用国内的镜像,比如淘宝:
# composer config -g repo.packagist composer https://mirrors.aliyun.com/composer/安装Symfony
首先我们建一个项目所在的文件夹:
# mkdir /var/www && cd /var/www然后需要我们选择安装的类别,一种是安装一个传统的web项目,另一种是现在流行的微服务。两者在安装的组件上有一些小的差异,比如web项目会安装twig模板组件,用来做web页面的渲染。这次我们选择传统的web项目:
# composer create-project symfony/website-skeleton my_project_name或者你也可以选择做一个微服务:
# composer create-project symfony/skeleton my_project_name配置服务器
配置就以Nginx为例,创建一个新的Nginx配置文件:
# vim /etc/nginx/conf.d/symfony_dev.conf写入如下配置内容:
1
2
3
4
5
6
7
8
9
10
11
12
13
14
15
16
17
18
19
20
21
22
23
24
25
26
27
28
29
30
31
32
33
34
35
36
37
38
39
40
41
42
43
44
45
46
47
48
49
50
server {
server_name symfony_dev.vm;
root /var/www/symfony_dev/public;
location / {
# try to serve file directly, fallback to index.php
try_files $uri /index.php$is_args$args;
}
# optionally disable falling back to PHP script for the asset directories;
# nginx will return a 404 error when files are not found instead of passing the
# request to Symfony (improves performance but Symfony's 404 page is not displayed)
# location /bundles {
# try_files $uri =404;
# }
location ~ ^/index\.php(/|$) {
fastcgi_pass 127.0.0.1:9000;
fastcgi_split_path_info ^(.+\.php)(/.*)$;
include fastcgi_params;
# optionally set the value of the environment variables used in the application
# fastcgi_param APP_ENV prod;
# fastcgi_param APP_SECRET <app-secret-id>;
# fastcgi_param DATABASE_URL "mysql://db_user:db_pass@host:3306/db_name";
# When you are using symlinks to link the document root to the
# current version of your application, you should pass the real
# application path instead of the path to the symlink to PHP
# FPM.
# Otherwise, PHP's OPcache may not properly detect changes to
# your PHP files (see https://github.com/zendtech/ZendOptimizerPlus/issues/126
# for more information).
fastcgi_param SCRIPT_FILENAME $realpath_root$fastcgi_script_name;
fastcgi_param DOCUMENT_ROOT $realpath_root;
# Prevents URIs that include the front controller. This will 404:
# http://domain.tld/index.php/some-path
# Remove the internal directive to allow URIs like this
internal;
}
# return 404 for all other php files not matching the front controller
# this prevents access to other php files you don't want to be accessible.
location ~ \.php$ {
return 404;
}
error_log /var/log/nginx/symfony_dev_error.log;
access_log /var/log/nginx/symfony_dev_access.log;
}访问Symfony
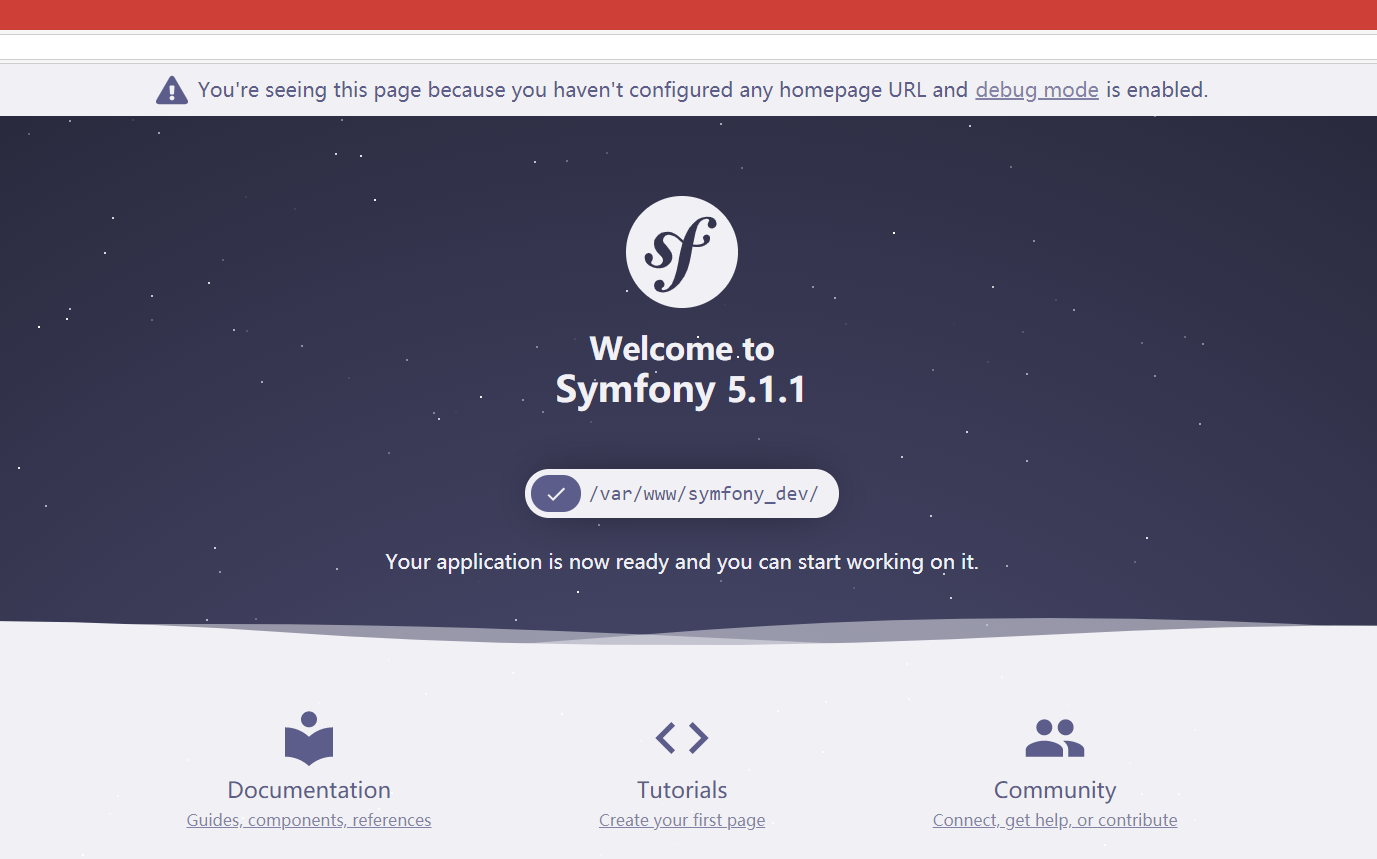
最后打开浏览器,输入我们配置好的域名访问,就可以看到Symfony的欢迎页面:

在src/Controller目录中,我们新建一个控制器文件:
1
2
3
4
5
6
7
8
9
10
11
12
13
14
15
// src/Controller/LuckyController.php
namespace App\Controller;
use Symfony\Component\HttpFoundation\Response;
class DefaultController
{
public function hello(): Response
{
return new Response(
'<html><body>Hello World!</body></html>'
);
}
}在config目录中的路由配置文件中增加一个路由:
1
2
3
4
5
# config/routes.yaml
app_hello:
path: /default/hello
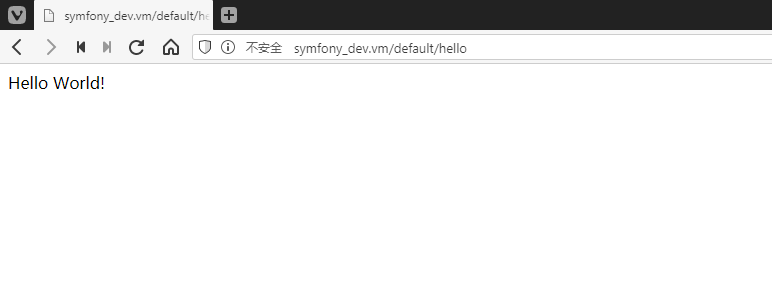
controller: App\Controller\DafualtController::hello最后在浏览器中访问配置好的地址,就可以看到我们写的“Hello World!”:

- [1] Symfony Blog
- [2] Symfony CLI